Installing PostgreSQL and pgAdmin on Ubuntu
Last updated:These steps were tested for Ubuntu 13, 14 and 16
Installation Tutorial
Firstly install the database package:
$ sudo apt-get install postgresql
Now pgAdmin; a simple interface to manage your database:
$ sudo apt-get install pgadmin3
Once the installation has finished, it's time to set up a password for the main account; you'll log in to postgresql:
The version of postgres may vary slightly depending upon the Ubuntu version
$ sudo -u postgres psql postgres
psql (9.1.10)
Type "help" for help.
And then type \password postgres, and you'll be prompted for your password:
postgres=# \password postgres
Then write your password in. (If you can't see what you type, it's ok, this is for security reasons).
Now type \q to exit postgres command-line interface:
postgres=# \q
Install Server Instrumentation
It's a package containing extra tools that help you manage your database. It's pretty much commonplace so I suggest you install it:
$ sudo apt-get install postgresql-contrib
Running pgAdmin
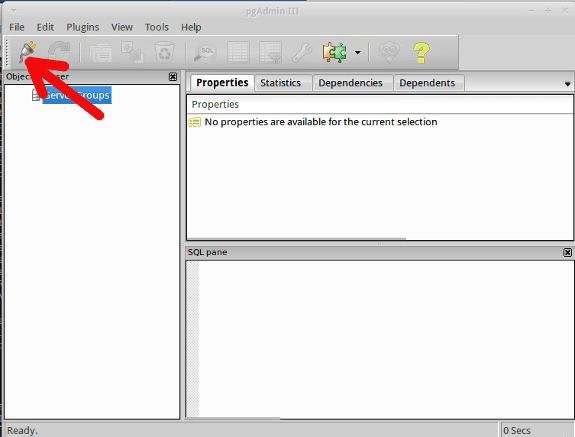
When you first open pgAdmin, you must Register a new Server (i.e.,create a new connection):

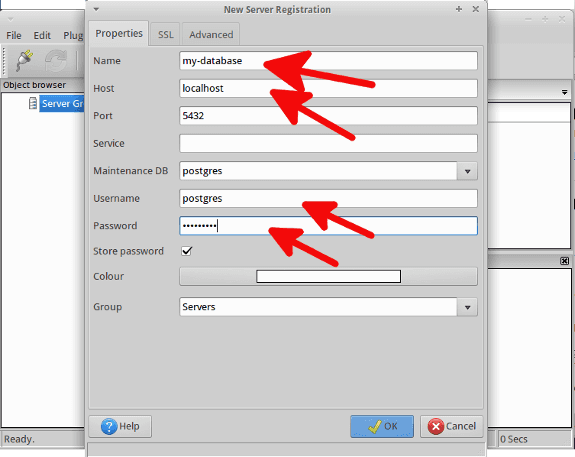
Some information will have been filled out for you. Set "localhost" as host, choose a name for your server, write "postgres" as username and write the password you've set in the previous steps for password:

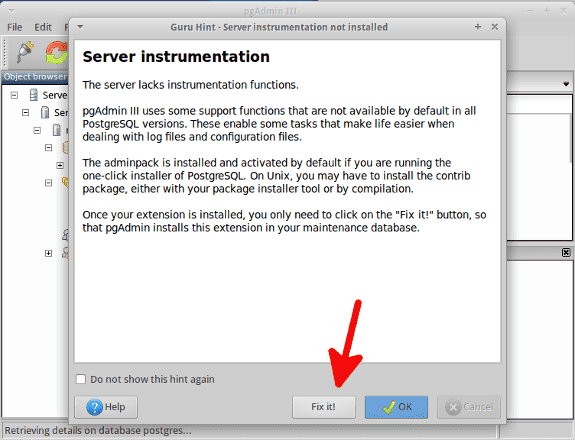
After you've done that, you might need to activate Server Instrumentation. Just click "Fix it!"
